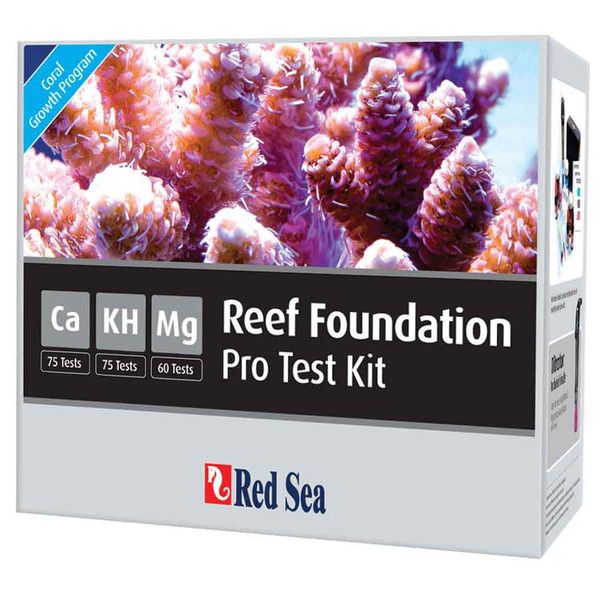
Red Sea - Reef Foundation Test Kit
$74.99
SKU: 253162
Manufacturer: Red Sea
MPN: R21510
Shop in Retail Store
Ship to Home
Ship to Lancaster, Pa Store
Details
Reef Foundation Pro Multi Test Kit provides you with calcium, alkalinity and magnesium test kits, all improved over previous models. Higher quality reagents, high precision titrators and clear instructions make using the test kits easy. Includes reagents, analytic grade glass vials and high precision titrator . Part of the Reef Care Program. Helps your corals achieve the best health, vivid, electric coloration and rapid growth. Reef Care lines include: Algae Management, Reef Colors, Reef Foundation and Reef Energy. For the healthiest corals, use the entire Reef Care Program.
Details:
Calcium - 75 tests, accuracy of +/- 2.5 ppm. KH/Alkalinity - 75 tests, accuracy of +/- 0.025 meq/l, .07 dKH Magnesium - 60 tests, accuracy of +/- 10 ppm.
Click here for a Reef Foundation Instruction Manual direct from Red Sea.
Click here for a Reef Care Information Guide direct from Red Sea.
Click here for a Reef Care FAQ direct from Red Sea.
Details:
Click here for a Reef Foundation Instruction Manual direct from Red Sea.
Click here for a Reef Care Information Guide direct from Red Sea.
Click here for a Reef Care FAQ direct from Red Sea.
Specifications
| Specifications | |
| MPN | R21510 |
| Manufacturer | Red Sea |
| Internal Id | 45347 |
Instructions
Directions for Calcium Pro Test Kit
1. Using the large syringe provided, place exactly 5 ml of the water to be tested into the glass vial.
2. Add 5 drops of Calcium Pro Reagent A and mix gently with the water sample.
3. Add a leveled measuring spoon of Calcium Pro Reagent B, close the vial with the cap and shake for 20 seconds. The test sample will now have the titration start color as shown on the instruction card.
4. Screw the glass vial onto the bottom of the Titrator.
5. Ensure that the dispensing tip is on the 1 ml titration syringe and fill with 1ml of Calcium Pro Titrant (C). [see note for filling titration syringe.]
6. Insert the syringe into the center of the Titrator so that the volumetric scale on the side of the syringe is visible. The graduations of the volumetric scale are 0.01 ml, equivalent to 5 ppm of calcium.
7. Add the first 0.6 ml of titrant (equivalent to 300ppm of calcium) by pressing the plunger of the syringe while gently swirling the Titrator. Continue adding the titrant gradually, swirling the Titrator after each addition and paying attention to the color in the vial. As the color in the vial approaches the end color as shown on the instruction card, add one drop at a time, swirling after each drop, until the end color is achieved. Note: If you have added 1 ml of Calcium Titrant C, without reaching the end color, the calcium concentration of your water sample is more than 500 ppm. Refill the syringe and continue to add titrant until you reach the end color.
8. Note the amount of titrant used (according to the initial and final position of the plunger not the liquid surface) and use the table to calculate the level of calcium in the water sample.
9. Return any unused quantity of titrant to the Calcium Pro Titrant C bottle.
Directions for KH Alkalinity Pro Test Kit
1. Using the large syringe provided, place exactly 10 ml of the water to be tested into the glass vial.
2. Screw the glass vial onto the bottom of the Titrator.
3. Ensure that the dispensing tip is on the 1 ml titration syringe and fill with 1ml of Alkalinity Pro Titrant. [see note for filling titration syringe.]
4. Insert the syringe into the center of the Titrator so that the volumetric scale on the side of the syringe is visible. The graduations of the volumetric scale are 0.01 ml, equivalent to an alkalinity of 0 .05 meq/L (0.14 dKH).
5. Add the first 0.4 ml of titrant (equivalent to an alkalinity of 2.0 meq/L – 5.6 dKH) by pressing the plunger of the syringe while gently swirling the Titrator. The test sample will obtain the titration start color as shown on the instruction card after the first few drops of titrant are added. Continue adding the titrant gradually, swirling the Titrator after each addition and paying attention to the color in the vial. As the color in the vial approaches the end color as shown on the instruction card, add one drop at a time, swirling after each drop, until the end color is achieved.
Note: If you have added 1 ml of alkalinity titrant, without reaching the end color, the alkalinity of your water sample is more than 5 meq/L (14 dKH). Refill the syringe and continue to add titrant until you reach the end color.
6. Note the amount of titrant used (according to the initial and final position of the plunger not the liquid surface) and use the table on the instruction card to calculate the level of alkalinity in the water sample.
7. Dispose of any unused quantity of titrant.
Directions for Magnesium Pro Test Kit
1. Using the large syringe provided, place exactly 2 ml of the water to be tested into the glass vial.
2. Add 5 drops of Mg Pro Reagent A, shaking the vial for 15 seconds after each drop.
3. Add 5 drops of Mg Pro Reagent B and mix the reagent gently with the water sample.
4. Screw the glass vial onto the bottom of the Titrator and wait for approx 60 seconds for the test sample to obtain the titration start color as shown on the instruction card. A precipitate will form on the bottom of the vial.
5. Ensure that the dispensing tip is on the 1 ml titration syringe and fill with 1ml of Magnesium Pro Titrant (C). [see note for filling titration syringe.]
6. Insert the syringe into the center of the Titrator so that the volumetric scale on the side of the syringe is visible. The graduations of the volumetric scale are 0.01 ml,equivalent to 20 ppm of magnesium.
7. Add the first 0.4 ml of titrant (equivalent to 800ppm of magnesium) by pressing the plunger of the syringe while gently swirling the Titrator. Continue adding the titrant gradually, swirling the Titrator after each addition and paying attention to the color in the vial. As the color in the vial approaches the end color as shown on the instruction card, add one drop at a time, swirling after each drop, until the blue end color is first achieved.Note: Shortly after the blue end color is achieved the liquid in the vial will turn from blue to violet. Do not continue adding titrant. If you have used more than 0.8ml of titrant you may have missed the end point and should redo the test.
8. Note the amount of titrant used (according to the initial and final position of the plunger not the liquid surface) and use the table on the instruction card to calculate the level of magnesium in the water sample.
9. Return any unused quantity of titrant to the Magnesium Pro Titrant C bottle.
Ratings & Reviews
1 review
Great test kits
by Peter
I have been using these kits for well over a year now. I love them. I used to use salifert but haven't went back since.